There are reasons for creating a zone in your client area. It could be
- You want to point to a different hosting provider using their IP address.
- Mapping a domain that isn't connected to any hosting provider to a third-party service or email provider.
Creating a zone record for your domain name to a Server IP/Account can be done via your Client area. It is simple, but your domain nameservers must point to our default nameservers: nsa.whogohost.com and nsb.whogohost.com. To achieve this your domain nameservers must point to our default nameservers (nsa.whogohost.com and nsb.whogohost.com). Once that's set up, follow these steps:
Steps to Create a Zone
- Log in to your client area.
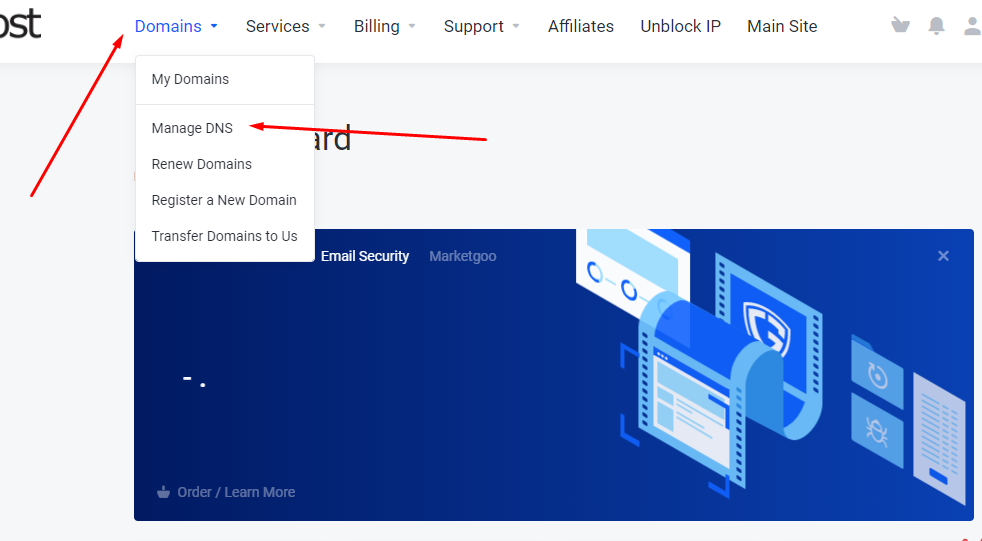
- Click on the drop-down beside domains, and click on Manage DNS on the list.
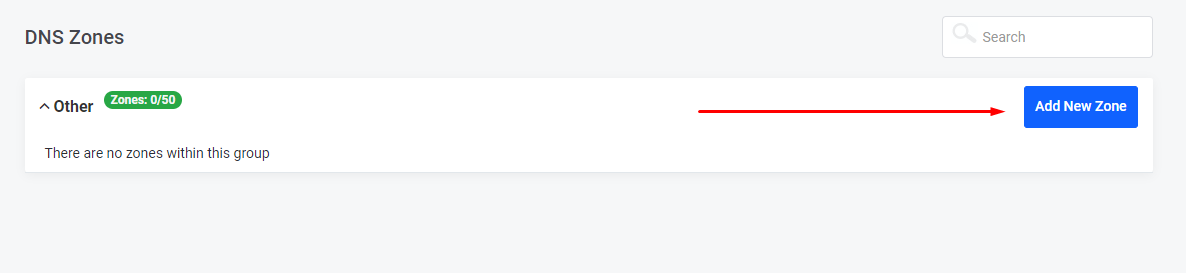
- Click on the Add new Zone button.
- Enter your domain name as the Zone Name and the A record (IP address) of the server in the space provided.
- If you’re pointing to another hosting provider or a third-party platform (like a free blog), you will need to get the IP from your hosting provider;
- If you’re connecting to a third-party email service, contact us and we will provide the IP to use.
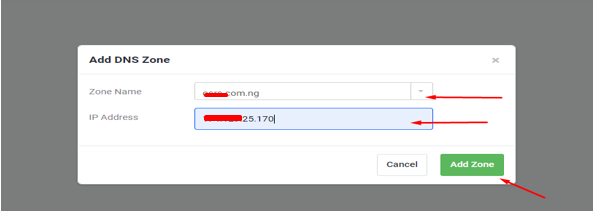
- Select Add Zone.
Creating a zone is a straightforward way to direct your domain to the right server, service, or email provider.
